Day 2: Full Back & Biceps finisher

Walking, brisk incline (3.5 mph / 5.6 km/h, 5% grade)
Set the treadmill to a 5% incline and keep your heart rate between 120 and 140 bpm. Walk at a fast pace; do not run, as the intensity should stay within this range. You can also choose any other type of cardio, such as the elliptical, stationary bike, or stair climber, as long as your heart rate remains between 120 and 140 bpm. Perform this cardio in the morning on an empty stomach or, if that’s not possible, immediately after your weight-training session.
Single-arm reverse grip high row machine Round 1
-
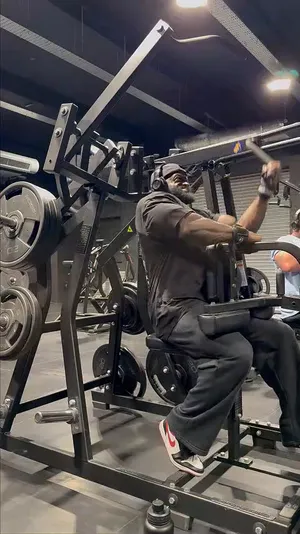
SET 1 - warm up
Weight: Choose a heavy weight that allows you to perform 10–12 reps with 3–5 reps left in reserve (e.g., 10 kg per side). Grab the handle with a reverse grip. Drive your elbow down and toward your hip. As you pull, lift your upper chest toward the ceiling and draw your shoulder back behind your chest. At the bottom, squeeze your back hard for 1–2 seconds, then return to the starting position under control, taking 3–5 seconds on the way up. If your gym doesn’t have this machine, use a lat pulldown machine with a D-handle and perform the exercise one arm at a time, following the same principles described below. Grab the D-handle with a neutral grip. As you pull the weight down, gradually twist the handle, and at the bottom of the movement, squeeze your latissimus as hard as possible before slowly returning to the starting position.
Reps: 10 - 12 per arm -
Rest: 1m 30s
-
SET 2 - preparatory set
Weight: Choose a heavy weight that allows you to perform 10–12 reps with 2-3 reps left in reserve (e.g., 20 kg per side). Grab the handle with a reverse grip. Drive your elbow down and toward your hip. As you pull, lift your upper chest toward the ceiling and draw your shoulder back behind your chest. At the bottom, squeeze your back hard for 1–2 seconds, then return to the starting position under control, taking 3–5 seconds on the way up. If your gym doesn’t have this machine, use a lat pulldown machine with a D-handle and perform the exercise one arm at a time, following the same principles described below. Grab the D-handle with a neutral grip. As you pull the weight down, gradually twist the handle, and at the bottom of the movement, squeeze your latissimus as hard as possible before slowly returning to the starting position.
Reps: 10 - 12 per arm -
Rest: 2 m
-
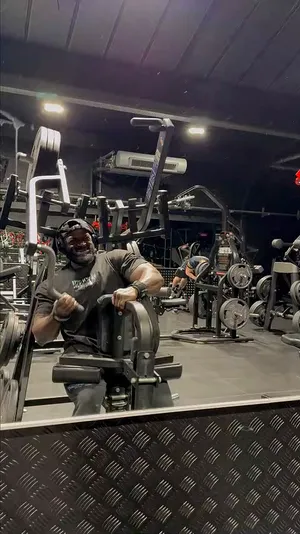
SET 3
Weight: Go as heavy as possible while still maintaining proper form. Aim for 10–12 reps, reaching complete failure with no reps left in reserve (e.g., 30 kg per side). Grab the handle with a reverse grip. Drive your elbow down and toward your hip. As you pull, lift your upper chest toward the ceiling and draw your shoulder back behind your chest. At the bottom, squeeze your back hard for 1–2 seconds, then return to the starting position under control, taking 3–5 seconds on the way up. If your gym doesn’t have this machine, use a lat pulldown machine with a D-handle and perform the exercise one arm at a time, following the same principles described below. Grab the D-handle with a neutral grip. As you pull the weight down, gradually twist the handle, and at the bottom of the movement, squeeze your latissimus as hard as possible before slowly returning to the starting position.
Reps: 10 - 12 per arm -
Rest: 2 m
-
SET 4
Weight: same as in the previous set (e.g., 30 kg per side). Grab the handle with a reverse grip. Drive your elbow down and toward your hip. As you pull, lift your upper chest toward the ceiling and draw your shoulder back behind your chest. At the bottom, squeeze your back hard for 1–2 seconds, then return to the starting position under control, taking 3–5 seconds on the way up. If your gym doesn’t have this machine, use a lat pulldown machine with a D-handle and perform the exercise one arm at a time, following the same principles described below. Grab the D-handle with a neutral grip. As you pull the weight down, gradually twist the handle, and at the bottom of the movement, squeeze your latissimus as hard as possible before slowly returning to the starting position.
Reps: 10 - 12 per arm -
Rest: 2 m
Lat Pulldown Round 2
-
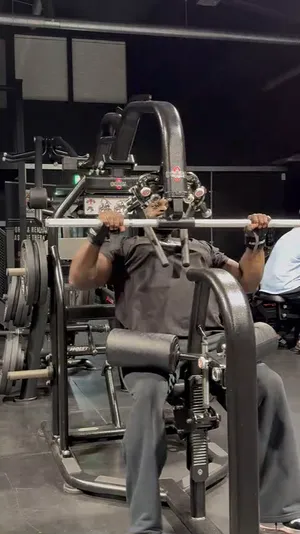
SET 1
Weight: heavy enough for 12 - 15 reps (example: 40kg). The goal here is not to go extremely heavy and perform fewer reps. Choose a challenging weight that allows you to stay within the 10–15 rep range. My setup: Grab the bar slightly wider than shoulder-width, but not too wide. A common mistake is using an extremely wide grip and holding the bar all the way at the ends. Pull your elbows directly toward your ribs, as if you are trying to touch them, and bring the bar toward your upper chest. As the bar reaches your chest, lift your chest up and pull your shoulders back. Think about raising your clavicle toward the ceiling, as if you were trying to balance a bottle of water on your upper chest. Do not lean backward. A common mistake is leaning too far back and using momentum to pull the weight. Instead, pull your elbows down toward your hips and lean back only slightly, just enough to bring the bar toward your upper chest.
Reps: 12 - 15 -
Rest: 2 m
-
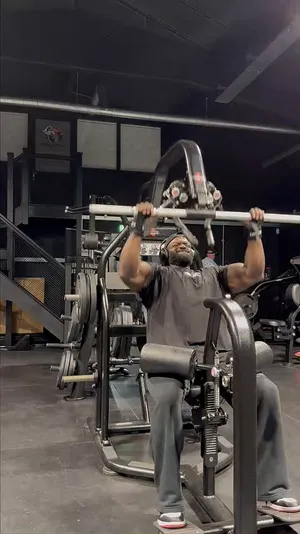
SET 2
Weight: 20% heavier than in the previous set (example: 50kg). The goal here is not to go extremely heavy and perform fewer reps. Choose a challenging weight that allows you to stay within the 10–15 rep range. My setup: Grab the bar slightly wider than shoulder-width, but not too wide. A common mistake is using an extremely wide grip and holding the bar all the way at the ends. Pull your elbows directly toward your ribs, as if you are trying to touch them, and bring the bar toward your upper chest. As the bar reaches your chest, lift your chest up and pull your shoulders back. Think about raising your clavicle toward the ceiling, as if you were trying to balance a bottle of water on your upper chest. Do not lean backward. A common mistake is leaning too far back and using momentum to pull the weight. Instead, pull your elbows down toward your hips and lean back only slightly, just enough to bring the bar toward your upper chest.
Reps: 12 - 15 -
Rest: 2 m
-
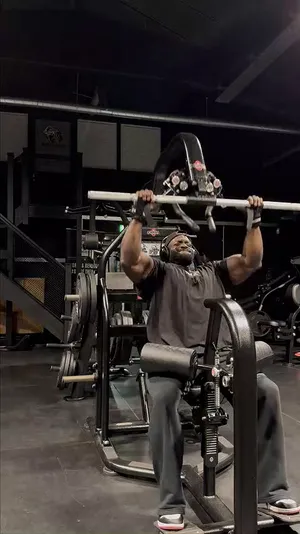
SET 3
Weight: Go as heavy as possible while still being able to perform 10–12 clean reps without compromising your form. I recommend using a weight that is 10–20% heavier than in the previous set (example: 60kg). The goal here is not to go extremely heavy and perform fewer reps. Choose a challenging weight that allows you to stay within the 10–15 rep range. My setup: Grab the bar slightly wider than shoulder-width, but not too wide. A common mistake is using an extremely wide grip and holding the bar all the way at the ends. Pull your elbows directly toward your ribs, as if you are trying to touch them, and bring the bar toward your upper chest. As the bar reaches your chest, lift your chest up and pull your shoulders back. Think about raising your clavicle toward the ceiling, as if you were trying to balance a bottle of water on your upper chest. Do not lean backward. A common mistake is leaning too far back and using momentum to pull the weight. Instead, pull your elbows down toward your hips and lean back only slightly, just enough to bring the bar toward your upper chest.
Reps: 10 - 12 -
Rest: 2 m
Chest supported upper back row Round 3
-
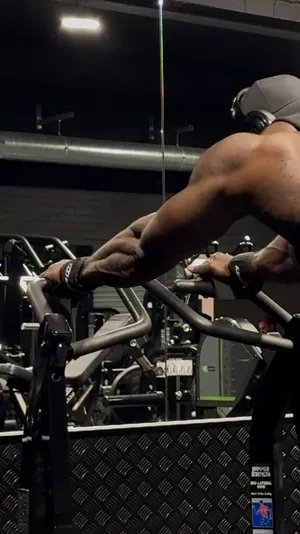
SET 1 - preparatory set
Weight: heavy enough for 10 - 15 reps with a few reps left in reserve (example: 20kg per side). My setup: Lower the seat so the handles are in line with your lower chest. Use this wide overhand grip to target the upper back. Fully stretch your arms during the negative part of the rep. As you pull, lift your chest up and bring your shoulders back. At the end of each rep, squeeze your back for 1 second. Think about raising your clavicle toward the ceiling, as if you were trying to balance a bottle of water on your upper chest without letting it fall. At the end of the movement, keep the angle between your elbow and ribs at around 75 degrees, not 90 degrees.
Reps: 10 - 15 -
Rest: 2 m
-
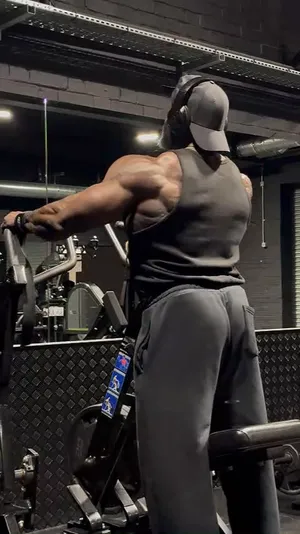
SET 2
Weight: Go heavier and choose a weight that allows you to perform 10–15 reps, reaching muscle failure with no reps left in reserve (example: 30kg per side). My setup: Lower the seat so the handles are in line with your lower chest. Use this wide overhand grip to target the upper back. Fully stretch your arms during the negative part of the rep. As you pull, lift your chest up and bring your shoulders back. At the end of each rep, squeeze your back for 1 second. Think about raising your clavicle toward the ceiling, as if you were trying to balance a bottle of water on your upper chest without letting it fall. At the end of the movement, keep the angle between your elbow and ribs at around 75 degrees, not 90 degrees.
Reps: 10 - 15 -
Rest: 2 m
-
SET 3
Weight: same as in the previous set (example: 30kg per side). My setup: Lower the seat so the handles are in line with your lower chest. Use this wide overhand grip to target the upper back. Fully stretch your arms during the negative part of the rep. As you pull, lift your chest up and bring your shoulders back. At the end of each rep, squeeze your back for 1 second. Think about raising your clavicle toward the ceiling, as if you were trying to balance a bottle of water on your upper chest without letting it fall. At the end of the movement, keep the angle between your elbow and ribs at around 75 degrees, not 90 degrees.
Reps: 10 - 15 -
Rest: 2 m
Seated Cable Row Round 4
-
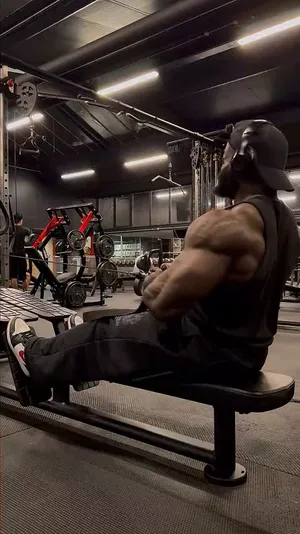
SET 1 - preparatory set
Weight: heavy enough for 10 - 15 reps, but aim for more reps; test the weight here (example: 40kg). My setup: Lean forward before each pull to fully stretch your back. As you pull, lift your chest and drive your shoulders back, squeezing your back for 1–2 seconds at the end of the movement. Avoid leaning too far back, as this reduces back engagement, and never use momentum to complete the pull until the final few reps. There are two variations of this exercise. First variation: pull toward your upper abs with your elbows flared out to target the mid-back more. Second variation: pull toward your lower abs with your elbows tucked in to focus more on the latissimus.
Reps: 10 - 15 -
Rest: 2 m
-
SET 2
Weight: Adjust the weight so you can complete 10–15 reps. If you did fewer than 10 reps in the previous set, the weight was too heavy, so reduce it by 20%. If you feel you could have done more than 15 reps with a few reps still in reserve, increase the weight by 20%. (for example, 55 kg). So, go as heavy as possible while still being able to complete 10–15 reps with proper form and with no reps left in reserve. The setup is the same as described in the first set.
Reps: 10 - 15 -
Rest: 2 m
-
SET 3
Weight: same as in the previous set (for example, 55 kg). Complete 10–15 reps with proper form and with no reps left in reserve. The setup is the same as described in the first set.
Reps: 10 - 15 -
Rest: 2 m
Cable Pullover Round 5
-
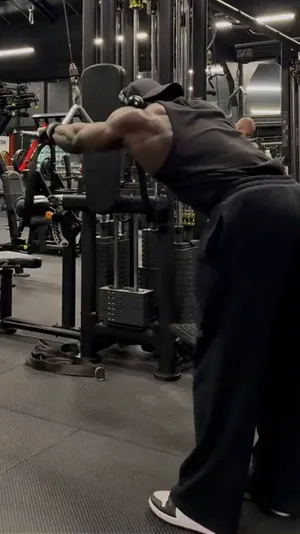
SET 1
Weight: Choose a weight that allows you to get as close as possible to 15 reps while still leaving at least 2 reps in reserve. Use this set to test the weight (example: 15kg). My setup: Stretch your back during the negative part of the rep. As you pull, raise your upper body only slightly and pull toward your hips. Keep your arms naturally bent throughout the entire movement and do not bend them more at the bottom as if you were doing a rope triceps extension. At the end of each rep, push your chest up and bring your shoulders back. PRO TIP: Imagine that you’re pushing the cable downward during the first half of the rep. From the halfway point, transition into pulling the cable toward your hips, as described above. Use a bar attachment as shown in the video.
Reps: 10 - 15 -
Rest: 2 m
-
SET 2
Weight: Go as heavy as possible while still completing 10–15 reps with proper form and no reps left in reserve. Aim for the higher end of the rep range, getting as close to 15 reps as possible (example: 20kg). My setup: Stretch your back during the negative part of the rep. As you pull, raise your upper body only slightly and pull toward your hips. Keep your arms naturally bent throughout the entire movement and do not bend them more at the bottom as if you were doing a rope triceps extension. At the end of each rep, push your chest up and bring your shoulders back. PRO TIP: Imagine that you’re pushing the cable downward during the first half of the rep. From the halfway point, transition into pulling the cable toward your hips, as described above. Use a bar attachment as shown in the video.
Reps: 10 - 15 -
Rest: 2 m
-
SET 3
Weight: same as in the previous set (example: 20kg). My setup: Stretch your back during the negative part of the rep. As you pull, raise your upper body only slightly and pull toward your hips. Keep your arms naturally bent throughout the entire movement and do not bend them more at the bottom as if you were doing a rope triceps extension. At the end of each rep, push your chest up and bring your shoulders back. PRO TIP: Imagine that you’re pushing the cable downward during the first half of the rep. From the halfway point, transition into pulling the cable toward your hips, as described above. Use a bar attachment as shown in the video.
Reps: 10 - 15 -
Rest: 2 m
Cable Curls Round 6
-
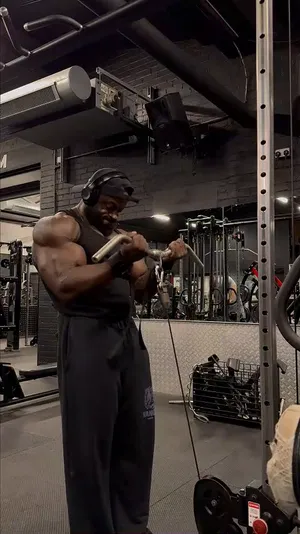
SET 1
Weight: Go as heavy as possible while still being able to complete 12–15 proper reps with no reps left in reserve. Aim to reach failure as close to 15 reps as possible (example: 15kg). Attach a straight bar or EZ-bar to the cable. Curl the bar all the way up and squeeze your biceps hard at the top. Then lower the weight slowly and under control, taking 3–4 seconds to return to the starting position.
Reps: 12 - 15 -
Rest: 2 m
-
SET 2
Weight: Go 1–2 plates heavier than in the previous set. You must complete at least 10 proper reps with good form, but aim to get as close to 15 reps as possible (example: 20kg). Attach a straight bar or EZ-bar to the cable. Curl the bar all the way up and squeeze your biceps hard at the top. Then lower the weight slowly and under control, taking 3–4 seconds to return to the starting position.
Reps: 10 - 15